Tuesday, August 13, 2013

Garden Hacks Hearing the Inner Call of the Garden


I have always loved to garden.  But after buying our first house in Richmond,CA  I have become (dare I say it) obsessed with gardening.  Living in Northern California with our Mediterranean climate means a lot of time outdoors.  So it makes sense to create attractive outdoor spaces.  But once that dirt was my own…look out!  I was a woman with a mission.  And that mission was to grow as much food as possible.  One might attribute that to my inner homesteader, my love of cooking and preserving, the local food movement or my proximity to Bezerkley.  Regardless it stuck.

My first challenge was to hear the secret inner call of my own personal yard. To say that Northern California weather varies by area is a huge understatement.   The temps often vary 30+ degrees between the coast and inland.  Taking in the huge number of other factors that can affect the garden such as fog, wind, slope, drainage, clay and you realize… we are not in Kansas anymore. Not to say gardening in Kansas is easy, but the sheer variations and possibilities of the Northern California Landscape demanded I up my game.
In this ever progressing journey I’ve learned a few tricks or “hacks” as I like to call them.

Hearing the Inner call of the Garden:
In order to discover what will thrive in your garden, you need to experiment and observe.  My first rule of thumb is to spend some time EVERY day in the garden getting in tune with what is going on.  You will discover such things as where the sun rises and falls and how that changes over the year, what thrives, what weeds are invasive,  are there snails, butterflies, gophers, does your soil hold water among other things.
As you are observing, it is worth recording and organizing your observations.  This way you can experiment with new things and find what works in your garden

Organizing Hacks
Below are some the tricks I use


Garden Journal:  I highly recommend keeping a garden journal. Moleskin puts out a dedicated garden journal but obviously any notebook would work just as well.   My journal is mostly a diary with entries by date.   This particularly helps me remember optimal times to plant seeds.  If you are more of a graphic person you could use drawings or graphs.  The key is to document what works and what doesn’t.   I always think I’ll remember exactly when I planted or what or the Latin name is of that particular plant that did so well, but invariably I don’t.  This leads me to another hack;


Saving Plant tags:  When I plant a seedling from a nursery,  I always put the original plant tag in with the plant.  This is especially true with plants I’ve never grown before.  I’m terrible with names and by the time I’m journaling that a plant is a winner I’ve most likely forgotten what it was.  When I find a winner, I usually put the tag in a pouch in my journal.  That way I have a library of things that work in my garden.


Seed Organizer:  Seeds are one of the best ways to experiment in my opinion.  It is easier to risk total failure if you have only invested is $3 in seeds.  Note that seeds seem to accumulate.  This is why you will need some way to store them.  I use a plastic bin with a top.  The seeds are sorted alphabetically using index card dividers.  I put the seed packs in Ziploc bags and label them with a Sharpie.  The waterproof box and bags protect against moisture, if I happen to leave the box out in the rain or within sprinklers distance by mistake.  I find looking through the organizer is a great way to brainstorm what to plant next.   This also helps if you do any bulk ordering of seeds, you can sit down in one place and see what needs re-ordering.


Plant Markers for seeds: It’s hard to keep track of what seeds were planted where and when.  For this I use popcicle sticks as plant markers.  I have a huge pack of blank ones from the dollar store.  When I plant something, I write the plant name and the date I planted.  This helps when you are journaling to calculate germination time etc.


Storing all those organizational Tools:  All the above tools only work if you use them. My garden is at the base of a big hill.  I realized I wasn’t using the journal or the plant markers because I’d forget them in the house at the top of the hill.  My solution was to install an old mailbox on our fence.  It keeps everything dry and in one place.  In it I keep;  my journal and a pen, clippers, sharpie, popcicle sticks, twine and a trowel. 

I hope these were useful

Happy Gardening!

Tuesday, September 25, 2012

Search for a Blue Ribbon Winner


After attending the County Fair this year, I vowed to take a stab at entering some of my preserves.  Now I certainly make a mean blackberry jam, but I wanted something unique.  My peach mango was certainly a crowd-pleaser but I figured I could kick it up with crystallized ginger.  The results were pretty amazing if I do say so myself.  The ginger adds a background note that makes the fruit sparkle.

Below is  the recipe, but some helpful hints.

If you have never canned, I recommend the ball blue book as a start.  I'm assuming y'all know how to sterilize jars etc so as not to poison anyone.  If not please do some homework.  

I personally like to have chunks of fruit floating in the jam.  In order to achieve this, I purposely use some under-ripe peaches.

I keep a dish in the freezer to test whether the jam has jelled.  It hastens the cool down time so you can see if you are dealing with a liquid or a solid.

I'm not a huge fan of overly sweet jams.  Standard recipe might call for 9 cups of sugar, I use 6.  This means more time cooking but the fruit flavors pop when there is less sugar.

A trick for peeling the peaches.  Boil them in water for 1-2 minutes and cool in ice bath.  This causes the fruit to expand then contract making peeling easier. 

Ingredients:

8 cups peeled and chopped peaches
4 cups peeled and chopped mangos
6 cups of sugar
Juice of 2 lemons
1/3 cup minced crystallized ginger
4 tablespoons natural pectin.

Mix all the ingredients thoroughly, then split into 2 batches.  Jam just doesn't gel well in large batches.  For each batch cook over the highest heat possible while stirring constantly.  I cannot stress this enough for this low sugar jam.  You need to have the jam so molten hot that it is still sort of boiling while you stir.  Cook in this manner until the jam gels to the desired consistency.  Periodically test the jam's consistency by spooning a drop on the frozen plate.  For me this took 25 minutes, but as my husband says I like jam the consistency of black tar heroin.

Et voila 


Saturday, April 14, 2012

Sowing seeds spring fever.


Today was that first day of warmth where Spring fever hits hard and folks go a little bonkers.  They start tearing off clothing layers exposing white pasty flesh.  Folks who have no business riding a bike among cars are wobbling around in traffic and sporting bugs in their ear to ear grins.  Unfortunately it was also the day of the Annies Annuals Spring Party.  Which I would normally whole heartedly attend as the nursery is fabulous and I love to root my home team on and they are located in Richmond. But under the influence of Spring Fever and Mr. away in London and unable to provide the necessary financial restraint, I needed to decline the invitation.  (Pats self on back).

I did allow myself the more frugal indulgence of buying seeds.  (Annies doesn't sell seed).  I headed off to Berkeley Horticulture and came home with the above load of seeds.  

As you can see I purchased some lobelia, which normally is a dime a dozen at the local home despot or Orchard Supply.  The problem is that I wanted to plant baskets of Lobelia and what those box stores sell is not the trailing variety. I had been down this road before and tried to plant Lobelia unsuccessfully in our cold frame.  

The problem with planting Lobelia is two-fold.  As you can see the seeds are itty bitty, even smaller than a grain of salt.  It's really hard to water these with a hose.  Also the seeds want to be warm to germinate.  And then I came up with the perfect solution.


I took an old clamshell pack from cherry tomatoes and taped some of the holes on the bottom.  Filled it with potting soil and very carefully planted the seeds. 


I'm keeping it on the windowsill where I can very gently water in the sink.  It should be warmer next to the stove and under the solar tube, and especially with it's own little clamshelll greenhouse, so I have high hopes.


Sunday, March 25, 2012

An old friend finds a new home in the garden


Last summer we finally hacked down the rotted willow tree in our yard.  The willow was decrepid.  Willows don't do well in dry California.  The only reason I think it was planted by the insane tropical gardener who previously owned our home was to feed the gynormous philadendron. (savage gardening anyone?) In any case it had rust so out it went. Unfortunately this left a gaping hole into our neighbor's yard.  Who, though very nice, opted for the low maintenance basketball court in their yard instead of any greenery.

We, being bonsai folks and tree fanatics in general, agonized over finding the "perfect tree".  We toyed with the idea of a green japanese maple, but we wanted something larger than an ornamental.  Everything local was grafted and the price of a decent (more than a foot tall) tree was insane.


Then around rolls spring and one of our favorite bonsais starts to leaf.  We've had this elm for over 12 years.  It somehow survived our crazy anti-bonsai Weimairaner who liked to pull trees from their pots.  The form is lovely and Mr. has trained it's roots over a big rock.  And the light goes on.  We love this tree so giving it a forever home (OK I know that's sappy) actually meant something powerful to us.


I was a little concerned as we haven't trimmed this guys roots in a long time.  And sure enough it was root bound but the roots weren't strangling the tree so I think it'll do fine.

And here it is in place.


And as a bonus for all you savage gardeners.  Here's a closeup of the bloom on the philadendron who is still devouring the remainder of the willow stump.

Tuesday, March 13, 2012

Chicken Tortilla Soup


I've found Roast Chicken is the gift that keeps on giving.  First night you get roast chicken.  Next day you have chicken sandwiches or perhaps chicken burritos.  From there the possibilities are somewhat endless.  Well on my third day of roast chicken my true love I give to thee.  Chicken tortilla soup.


Ingredients
1 roasted chicken (picked over is fine there's still plenty of meat)
2 quarts of water
1 chopped onion
2-3 minced heads of garlic
1 can chopped tomatoes (if you can fire roasted with chilis even better)
1 teaspoon chili flakes (more or less depending upon how hot you like it)
2 tablespoons worchestershire sauce
1 1/2 cups frozen chopped okra
1 cup frozen corn
4 tablespoons rice vinegar
1 handful rice.

Put the whole chicken carcass in a dutch oven or stew pot. I roast my chicken stuffed with lemon and I'll even toss the lemon in. Cover with water and heat till boiling.  Keep at low boil for 45 minutes or until water resembles broth instead of water.

Remove chicken and set aside broth.  Allow chicken to cool then pull any remaining meat off .  Add meat to broth.  Add remaining ingredients except rice and return to a low boil for approximately 10 minutes.  Add rice and allow to cook for at least another 20 minutes.  This keeps fine (maybe even gets better) on the stove if you keep the heat low.  Salt and pepper to taste and serve in a bowl over tortilla chips.  Garnish with avocado slices or a dollop of sour cream.

Sunday, February 26, 2012

Felt Planters


Hello my name is Christl and I'm addicted to felt.  This is well known among family and friends, who collect stories and send me pictures of anything felt related.  A friend who had attended Stitches West called me up to tell me about some felt flower pot cozies she had seen.  Seeing as I am also an avid gardener, this got my wheels turning.

Access to felt was absolutely not a problem for me.  I sell felt (or technically fulled) accessories at Fiberpuppy.  I have all kinds of failed projects lying around.  I fondly refer to them as my Chernobyl collection.  Flower pots on the other hand are in short supply at my house.  My husband is a plant hoarder
Every container is in use as a holding cell for some bit of greenery he could not bear to part with.

Then it occurred to me that there is really no reason to even use a pot.  The felt actually retains water making it an ideal planter.  I wasn't 100% sure this would work so we started small, using succulents which tend to tolerate small containers.

We added dirt, then the plants and finished with lava rock.  We then soaked them in a bucket of water.  Look they actually float.


The felted containers I had were kind of odd shapes and didn't really want to stand up on their own.  I tried propping them up against other plants.


Then the second brilliant part of the plan emerged.  I should hang them on the fence.  Not only did this keep the plants upright, it created vertical planting space.

So we'll see how these plants fare, before I go whole hog creating planting installments all over the fence.  But I'm thinking I could be on to something wonderful.


Monday, February 20, 2012

February Garden

I've decided to tempt all you folks in colder climes with a few sneak peeks at what is going on in the garden.  We've been starting veggies under the cold frame and have actually harvested some lettuce.  Unfortunately, snails or slugs have been eating some of the new shoots but I over planted so it looks like some will make it.

There are also a number of things blooming.


Our beautiful Magnolia tree is in full bloom.  It has such a delicious odor and keeps blooming for near 3 weeks.  The creamy flowers against the dark green foliage is dreamy.


Our potted Aeonium is just about to pop.  The flowers on these succulents are just so unique.


This grows like a weed here.  It has wandered in through a neighbors yard.  I believe it is crocosmia, but I wouldn't swear to it since I never planted it.  The hummingbirds LOVE this so I let it be.


We've got a couple of these Echeveria planted in pots.  They are just starting to go into full glory.


And finally the Nicotiana I planted last year has overwintered and really never stopped blooming.  I keep meaning to pull this up but just when I'm about to hack it down I'll spy a luscious deep red bloom.


Tuesday, February 7, 2012

Building a Cold Frame


We've had a pretty mild winter here in Northern California with only about 2 inches of rain in January.  So we've been itching to get into the garden.  Unfortunately with our sloping lot, the yard is a cold dark place during the winter.  We thought we'd do something about it and decided to build a cold frame for the raised beds.


Our idea was to cover half the bed with a removable frame that could also be placed over the compost in the summer to speed decomposition with a little heat.


The materials were fairly inexpensive.  Some (fir I believe) strapping, brackets, screws, staples and a painters plastic drop cloth.


Well I've got to say the results have been a huge success.  Our lettuce (Grand Rapids) sprouted and we even harvested our first head yesterday.  Is it really February?  I even became bold enough to plant tomato seeds (Roma and Stupice) in front, after I placed a Thermometer inside the frame and it showed the temp at 82 degrees.  Perhaps that was wishful thinking, but if I fail I've only lost the cost of a few seeds.


Monday, November 14, 2011

Craft Fair Display


Last year being my first doing fairs, I didn't put much thought into my display.  I grabbed some cubes at my local recyclery to hang scarves off of and placed a bunch of plate display holders on my table to show my purses.  That didn't turn out so well.  The cubes basically blocked my line of vision to customers.  I had a crook in my neck from trying to peer around the dang thing.  The plate displays tipped over so many times so as to be useless.

This year I was determined to get it right.  I did some research to see other craft displays.  Etsy's blog had some decent general information about varying height etc. Unfortunately, I sell felted items which, while not heavy, are bulky so the table top cutesy vintage thingys which may be fine for earrings were never going to work for me.  I pored over the flickr show me your booth group and it came to me.


I decided upon a clothes line between two hat racks.  I didn't have hat racks so no problem I figured I'd build them out of 2 posts and a number of 1/2 inch dowels.  I basically just used a 1/2 inch paddle bit to drill holes for the dowels.  The nice thing is the dowels come out so I don't have to transport these as monster sculptures.  If I did this again, I'd only drill the holes perpendicular as getting the angles the same on the others was a pain.


Once I had the coat rack part set, I had to figure out how to secure them sufficiently to support a clothesline.  I was a bit stumped and wandered around Ace Hardware looking for a way to clamp the pole to my table. Let me tell you some of those clamps are very expensive.  I finally decided to use 2 christmas tree stands, which I filled with rocks.  For extra support I used bungee cords to secure the poles to the table.


Et voila.

Saturday, August 6, 2011

Beautiful Furniture


I have always wanted to make furniture.  I’m especially taken by furniture that takes it to the next level turning everyday useful items into works of art.  It’s what I try to do with my fiber creations.  As I have little to no woodworking ability I am forced to admire rather than create.

Here’s a secret you may not know.  Etsy (yes Etsy) is not just a place to find hipster t-shirts and fabulous earrings but a home to some absolutely fantastic furniture.  I thought I’d share a few of my favorites.


Check out this amazing rocking bed by Joe Manus of ShinerInternational.  If babies get rocked to sleep in cradles why not an adult version.


 This highback chair from Mateo Panzica of Lazarus Handplane screams steampunk to me. Although containing all kinds of industrial elements it is softened by the padded leather back.


This is an amazingly clever and green idea by Ruffhouse Arts.  These couches are made from old bathtubs.


This solid cherry credenza by Object Society reminds me of televisions from the 50's.


I am entranced by the lines on this endtable by Reed Handsuld.  It's kind of minimalist yet swirly all at the same time.

Tuesday, July 19, 2011

Camping Trip Cut Short


We are newly returned from camping.  We decided to go up to Union Valley Reservoir in Eldorado National Forest.  We brought along our friend Joy and our black and tan coonhound Greta.


We camped at a lovely site right across from the lake with views of snow covered peaks.  We settled in and feasted on a camp meal of franks and beans.  Greta proved her camping prowess.  Although technically on a leash she basically ran free and stayed in our campsite.


The next morning we were all about the lake.  Mr. took off to fish and Joy, Greta and I warmed ourselves in the sun so we could endure the cold lake.  Greta finally understood that she could swim and took to it with gusto.  As the afternoon arrived unfortunately so did the clouds.  I suggested a drive up to Loon Lake as we heard it was pretty.  When we arrived after the 45 minute drive, we discovered the $7 entrance fee.  I didn't want to pay, but I was outvoted.  We stopped at a picnic area to get our bearings.  After sitting at the picnic table I decided I needed another layer.  While trying to modestly regarb Mr and Joy approached the car.


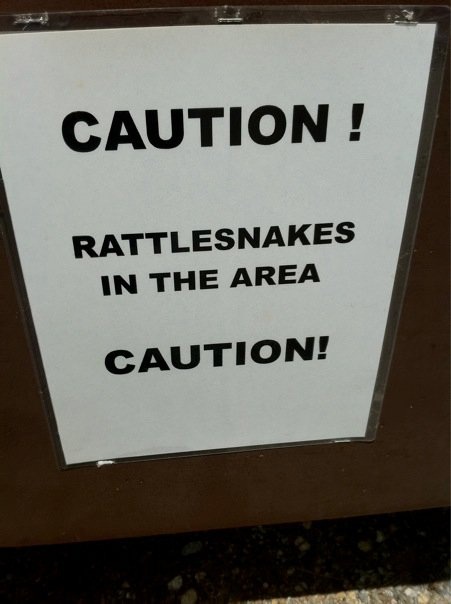
Greta had been bit by a rattlesnake lurking under the picnic table we were sitting at. Being fans of Venom ER we had some idea of the implications.  We gently and calmly hustled Greta into the car.  There were a ton of kids playing about so David ran over to warn folks.


Well apparently these folks knew all about rattlesnakes.  This guy went over and pinned the rattlesnake with an oar.  He picked it up and held it for another guy to cut the head off.  They handed the dead snake to us and offered us their snakebite kit.  We declined the kit as we have heard they are ineffective.


Then we were off like the proverbial bat outa hell.  The nearest thing that could be called a town was Pollock Pines and that was over an hour away.  Despite spotty cell reception we managed to locate a vet and inform them we were on the way.  All the way down the mountain, Greta's face began to swell and swell.  She started to resemble an uneven Rottweiller.  She never uttered a peep the whole drive (although I did with Mr.'s Mario Andretti maneovers) and remained upright and alert.


At the vet we were greeted with this display.  I'm thinking "I know I know".  The vet was kind but sort of circumspect and I was in full panic mode by now.  Eventually it became clear that "protocol" dictated $600 worth of antivenom, but the vet having experience in these matters felt he could treat Greta without it since she was still standing after an hour.


We pulled out our "dead" rattlesnake for ID and darned if the dang headless thing didn't move.


We opted for the non-venom treatment and after 2 hours and much medicine she was released.


She was dopey as hell and I think she might have been hallucinating.  She was looking at me like I had 2 heads and would not lie down even though she was wobbling like crazy.  She seemed utterly spooked and had her tail firmly tucked against her tummy.  We decided to let her recover at home so we re-packed the car full of stuff that Joy and I had tossed in willy nilly while David had waited at the vet and headed home.

I am happy to say she has made a full recovery.  I'm not so sure I have.  24 hours after the bite, we took out the snake to inspect,  and darned if it didn't wiggle it's headless body.